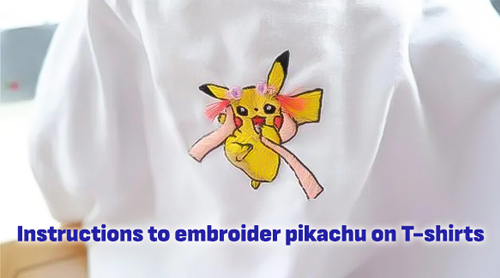
Discover the Artistry of T-Shirt Embroidery: A Comprehensive Guide
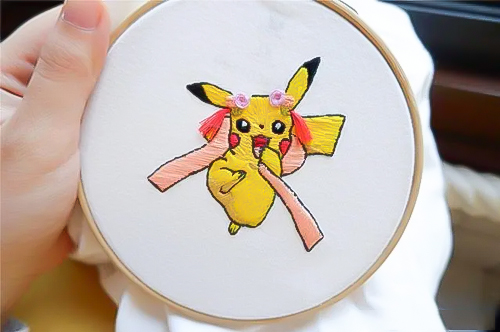
Embroidery on T-shirts not only adds a unique aesthetic touch but also allows you to express your creativity. Instead of opting for pre-embroidered shirts, why not try your hand at creating your own personalized designs? In this guide, we walk you through the process of embroidering patterns on T-shirts.
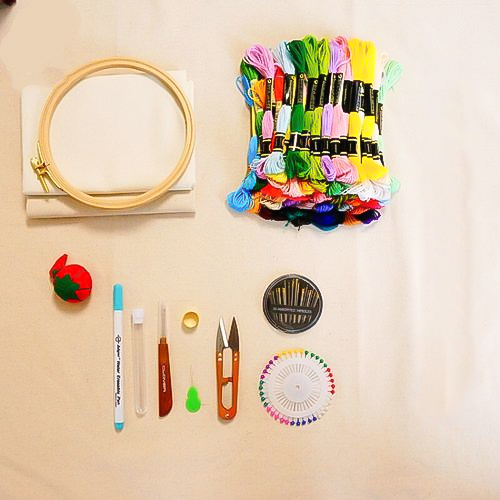
Here are the essential materials and tools you’ll need:
- Embroidery materials: black thread, yellow thread, brown thread, red thread, pink thread, coral pink thread, a few spools, 100% cotton T-shirt.
- Embroidery tools: embroidery frame, needle, scissors.
- Embroidery techniques: backstitch, short and long stitch, satin stitch, seed stitch.
Follow these steps to create a Pikachu embroidery:
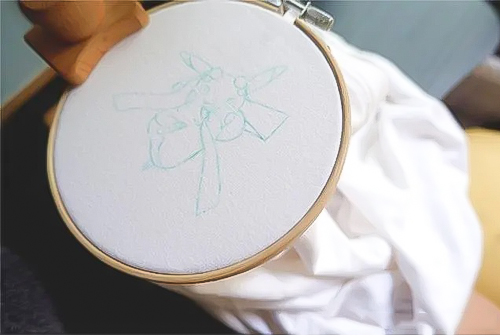
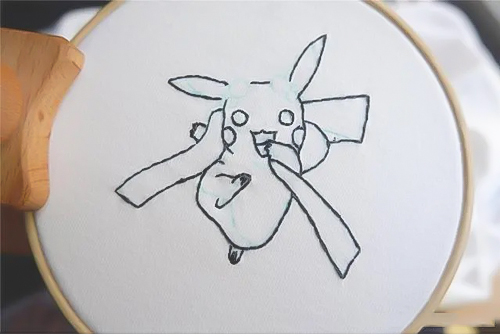
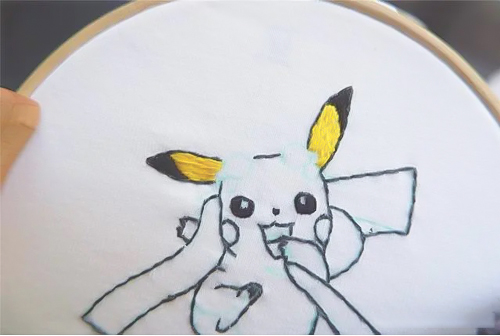
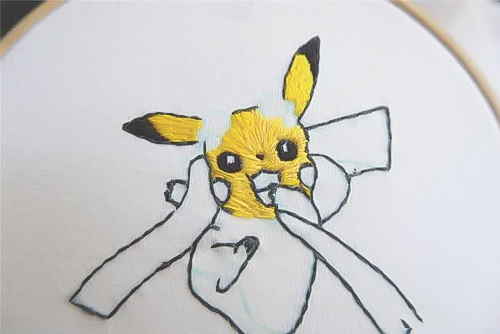
1. First, let’s outline Pikachu. Choose 2 strands of black cotton thread, use the backstitch method, draw the needle from any point on the outline of Pikachu, outline the embroidery along the outline, embroider the position shown in Figure 2, and leave the ear boundary and head flower, eye whites and leg shadows.
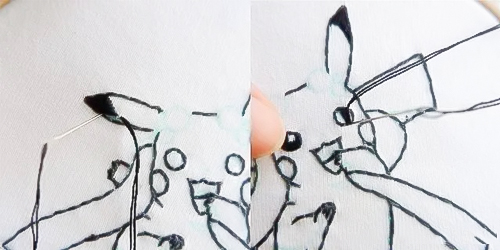
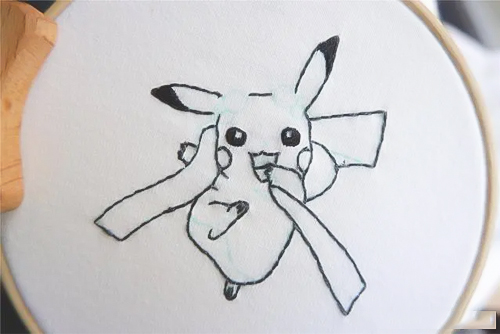
2. In order to save thread changes, we embroider the black part of Pikachu first. According to the relative vertical direction of the ear dividing line and the eyes, arrange the embroidery and fill it. The whites of the eyes should be left blank, and no embroidery is required.
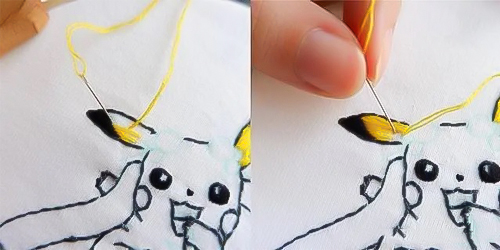
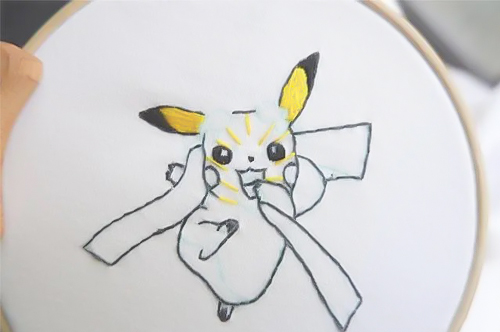
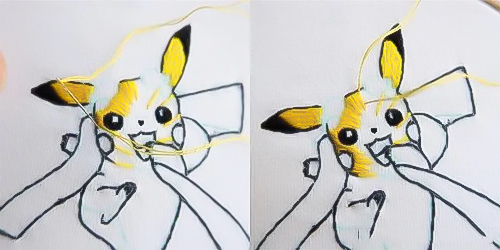
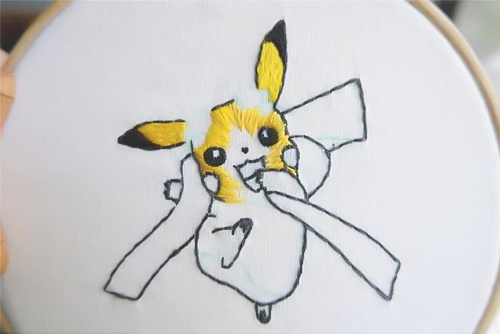
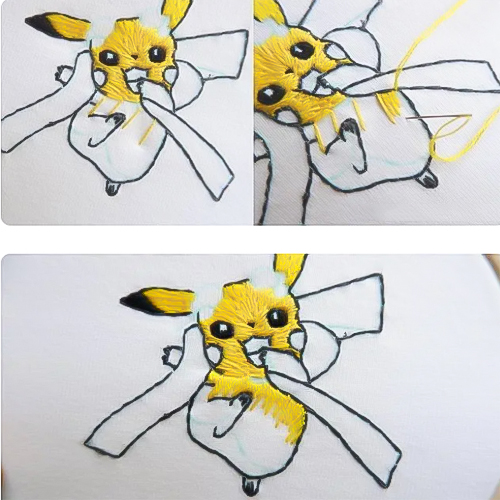
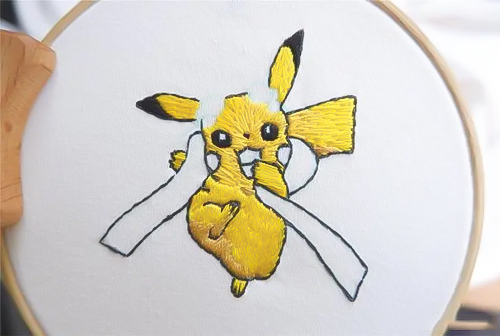
3. Next, start mass filling the body. We start with the ear, choose 2 strands of yellow cotton thread, divide the ear part into two layers, and fill it with long and short stitches.
4. The face is more complicated. We can first use embroidery thread to embroider the stitch direction, and then fill and embroider grid by grid according to the stitch direction. The direction of the stitches on the face should be concentrated from the outside to the nose and mouth. We embroider the thread according to the direction of the stitches, and arrange the long and short stitches of the first layer of embroidery. Then, in the same way and in the same order, embroider the stitch direction and filling of the second layer, and the Pikachu’s face embroidery is completed.
5. Once the face is embroidered, the body is much simpler. First, embroider the stitch direction along the body slope, and then arrange the long and short stitches to fill. Embroidery layer by layer until the entire body part is filled.
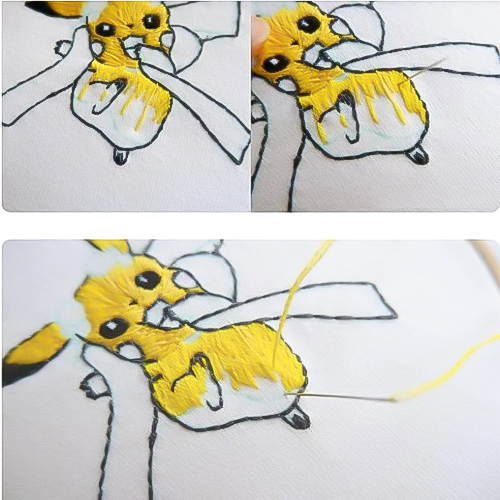
6. The shadows of the hands and legs (2 strands of khaki cotton thread) are relatively thin and narrow, and the embroidery can be embroidered in a horizontal satin embroidery. The tail can be seen as several layers horizontally, and the long and short stitches are embroidered continuously. In this way, the body parts are all embroidered.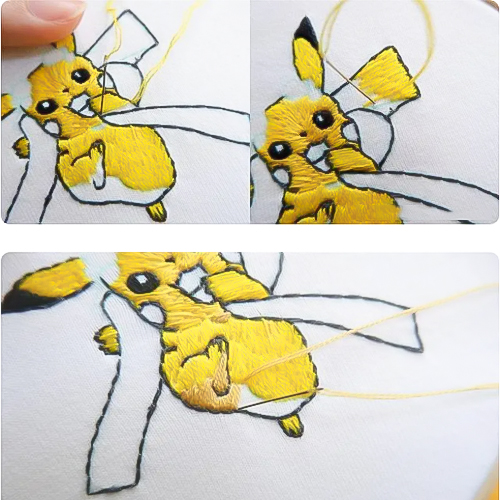
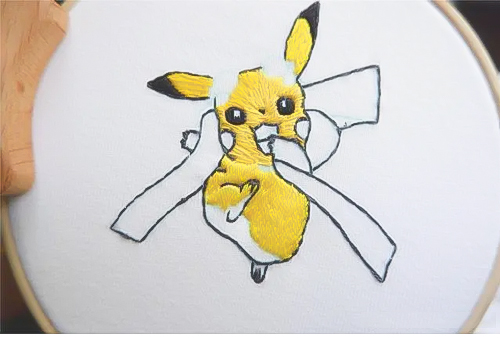
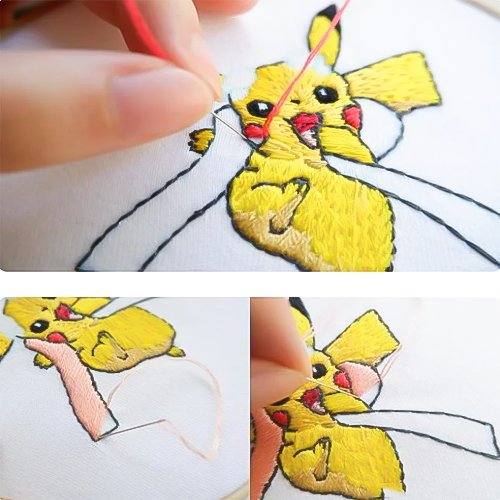
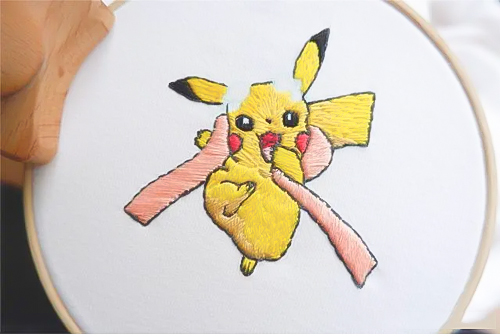
7. 2 strands of red cotton thread, arranged horizontally to embroider blush and the upper part of the mouth. The lower part of the mouth is filled with 2 strands of pink cotton thread. For the streamer part, 2 strands of orange-pink cotton thread are required, and the embroidery is arranged according to the inclined direction of the streamer.
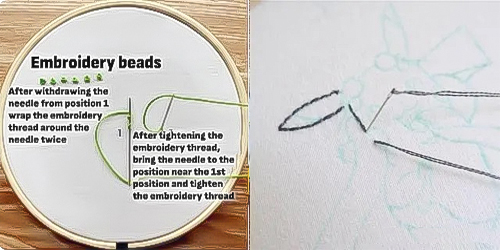
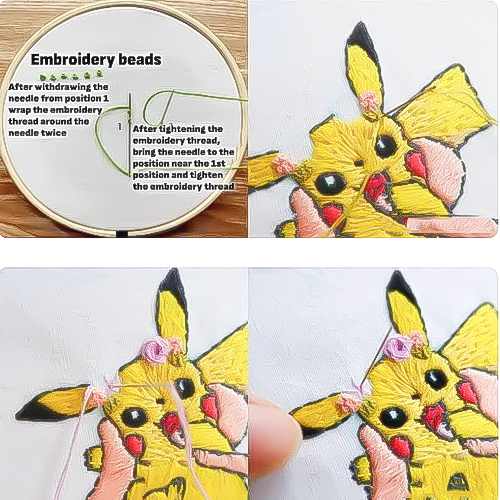
8. The flower on Pikachu’s head is divided into three parts, namely the small flower, the big flower and the tassel. For the small flower part, you can choose 2 strands of 2-color cotton thread, and use the grain embroidery method to fill the small circle. For large flowers, you can use the spider web embroidery rose stitch: first embroider 5 dividing lines from the outside to the inside of the circle, bisecting the circle. Then take out the needle from the inner side of any crossing line of the circle, pull out the cotton thread, pass through the dividing line one by one, and coil the cotton thread on the dividing line until the whole circle is coiled.

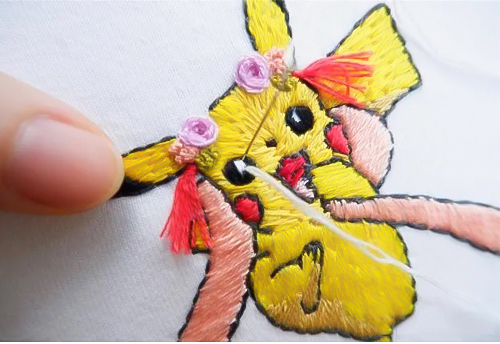
9. For the tassel part, we choose 2 strands of red cotton thread, do not tie a knot, insert the needle from the front of the embroidery, pull the cotton thread and leave a small section outside, pass the cotton thread again, and leave a small loop on the front of the embroidery. In this way, it is enough to embroider 2-3 small coils on the front of the embroidery picture. Secure with two more stitches at the top of the fringe. Cut the coil with scissors, trim the size, and the small tassel is ready.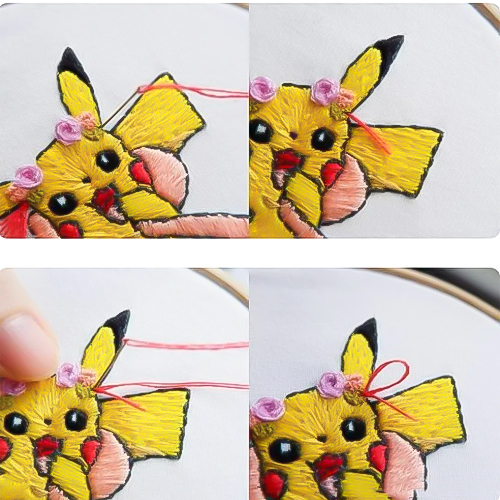

Here are some tips for embroidering on T-shirts:
- Choose embroidery thread that matches your t-shirt. Cotton thread is suitable for thick and sturdy t-shirt fabric, while silk thread is suitable for soft and lightweight fabrics.
- Adjust the needle size according to the fabric thickness. Use a smaller needle for thin fabric and a larger needle for thicker fabric.
- If desired, you can change the colors of the embroidery thread to create different effects and variety for the flowers on your t-shirt.
- Maintain an upright posture while embroidering and lean gently against a wall to reduce strain and back pain.


