How Do I Make My Own Screen Print Transfers: Expert DIY Tips
As a custom designer, you understand the challenges of crafting top-notch screen print transfers. Don’t worry; achieving unique, high-quality prints is entirely possible with the right know-how and tools! If you’re on the hunt for budget-friendly options or ways to create lasting, professional-grade prints, this guide is your go-to resource.
In this guide, we’ll walk you through each crucial stage of creating vivid Plastisol Transfer prints. We’ll discuss choosing the perfect images, applying ink effectively, and mastering the curing process. Plus, we’ll help you decide whether going the DIY route or hiring professionals is the better option based on your budget and time constraints.
So, let’s dive in and make the process of printing customized designs a walk in the park!
Understanding the Basics of Plastisol Screen Print Transfers
To start making your own screen print transfers, you need a good grasp of the fundamentals – from materials to technique.
How do Plastisol transfers differ from other methods?
Plastisol transfers involve applying your design to a specialized release paper using screen printing ink. Afterward, you heat-press it onto the fabric. This technique is incredibly versatile; it works well on a range of fabrics like cotton and polyester. Find out Can You Screen Print On Polo Shirts here. Plus, it’s a cost-effective choice for large orders. You can even save the printed designs for later, adding a layer of convenience. While the colors are vibrant, they may not be as durable as traditional screen printing. Learn more about Does Screen Printing Last.
Now, let’s look at DTG. This method prints the design directly onto the fabric. It excels at capturing intricate details but falls short when it comes to bulk orders. Traditional screen printing, on the other hand, pushes ink through a mesh stencil onto the fabric. This offers durability and color intensity, but it’s not ideal for complex designs.
Heat Transfer Vinyl (HTV) is another option. Here, a vinyl design is cut out and heat-pressed onto the garment. Curious about the differences? Read our comparison of Screen Printing Vs Heat Press. If you’re wondering What Is The Best T-shirts For Heat Press, this method can provide clarity. Heat Transfer Vinyl it’s a great choice for layering but doesn’t fare well with intricate designs.
Lastly, we have sublimation printing. This is limited to polyester fabrics but delivers exceptional vibrancy and durability. Unfortunately, it’s not compatible with cotton.
Materials required for creating Plastisol screen print transfers
To create a Plastisol screen print transfer, you’ll need a specific set of tools and materials. First and foremost, you’ll need plastisol ink, which serves as the basis for your print. Next, you’ll require specialized transfer paper to print the design on, as well as a powder to apply over the inked design. Last but not least, you’ll need a heat press to cure the plastisol ink onto your chosen fabric. Discover What Size Heat Press Is Best For Shirts in our dedicated.
There’s more! To elevate your results, you might also opt for additional tools. For instance, squeegees and screens can improve your printing technique. If you’re dealing with larger designs, alignment templates, and paper cutters can come in handy. And if you’re aiming for multi-colored or intricate designs, image editing software is often a wise investment.
Step-by-step guide to preparing the screen
Creating high-quality Plastisol screen print transfers starts with preparing the screen correctly. By following this step-by-step guide, you’ll be on your way to crafting professional, durable transfers. Here’s what you’ll need: a nylon mesh coated with emulsion, a squeegee, and a source of ultraviolet (UV) light.
- Firstly, stretch your nylon mesh tightly across the frame. Use clamps to secure it, ensuring the mesh is taut in all directions. A tight mesh helps to avoid streaking during the printing process.
- Next, grab your squeegee and smoothly apply an even layer of emulsion to one side of the mesh. The emulsion acts as the base for your design.
- Now, it’s time for the UV exposure. Position your screen under a UV light source, like a photo bulb. Expose the emulsion-coated side for about 1-2 minutes. Make sure the screen lies flat and is continuously bathed in UV light for even exposure.
- After the exposure, use warm water and a sponge or brush to rinse away the unexposed areas. You’ll need to remove any lingering emulsion from the exposed mesh, creating clear spaces for ink transfer.
- Lastly, let your screen dry completely before moving on to the printing stage. If you’re wondering about time efficiency, you can read more about How Long Does It Take To Print A Shirt.
How to create a Plastisol screen print transfer
Creating Plastisol screen print transfers is an excellent way to bring your vibrant designs to a variety of items, including clothing, fabrics, mugs, and more. While making your own Plastisol screen prints can be a fulfilling hobby, it’s vital to grasp the basics before diving in. What Is A Screen Print Transfer? Here’s your step-by-step guide to making successful Plastisol screen print transfers. If you’re interested in more details, check out our guide on How To Make Transfers For T-Shirts.
1. Design Preparation:
- Create or select your desired design using graphic design software like Adobe Illustrator or CorelDRAW.
- Separate the colors in your design as each color requires its own screen.
- Invert (mirror) the design, as you will be transferring it onto a substrate.
2. Screen Selection:
- For finer details, use a screen with a higher mesh count (e.g., 230 mesh/inch).
- For thicker ink deposits, such as in white or opaque inks, use a screen with a lower mesh count (e.g., 110 mesh/inch).
3. Screen Coating:
- Degrease your screen to remove any impurities.
- Coat the screen with a photo-sensitive emulsion.
- Allow the screen to dry in a dark, cool place, ideally in a drying cabinet.
4. Exposing the Design:
- Print your design onto a transparent film, ensuring the design is dark enough to block out UV light.
- Place the film on the dried screen, design side down.
- Expose the screen to UV light. The exposure time will depend on your specific emulsion and light source.
- After exposure, wash out the screen with water. The design areas should wash out, leaving clear areas where the ink will pass through.
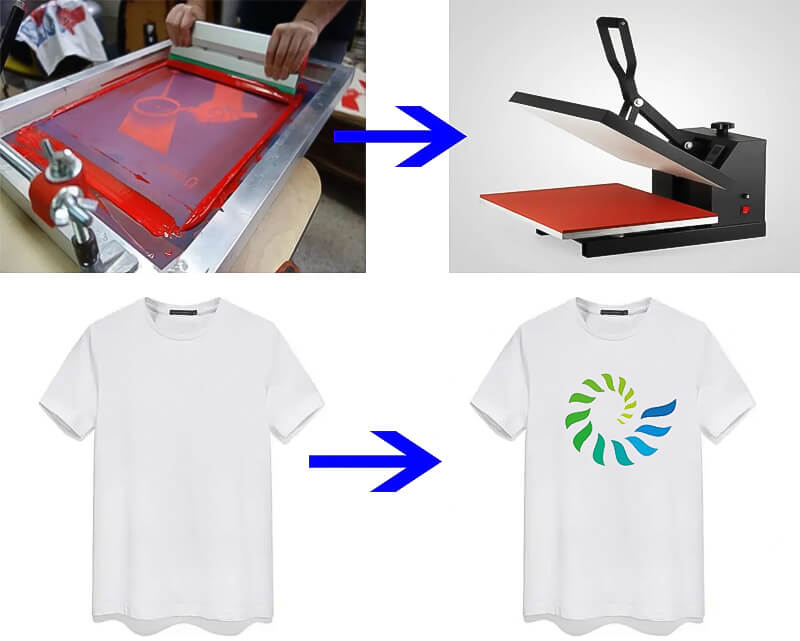
5. Printing the Transfer:
- Set up your screen on a screen printing press.
- Add plastisol ink to the screen.
- Place a transfer paper (typically coated on one side) on the platen with the coated side facing up.
- Use a squeegee to push ink through the screen onto the transfer paper.
- For multicolored designs, you will need to repeat this process for each color, ensuring proper registration between colors.
6. Drying the Transfer:
- Let the inked transfer paper dry, but do not fully cure it. It needs to remain semi-wet for successful transfer. A flash dryer or heat gun can speed up this process without fully curing the ink.
7. Transfer Application:
- Heat up your heat press to the recommended temperature for your specific plastisol ink (usually between 320°F and 375°F / 160°C and 190°C).
- Position your garment on the press.
- Place the transfer paper ink-side down on the garment.
- Press with medium to heavy pressure for 10-15 seconds.
- Remove the garment and peel away the paper while it’s hot (unless you are using a cold peel transfer).
What kind of ink is used for screen print transfers?
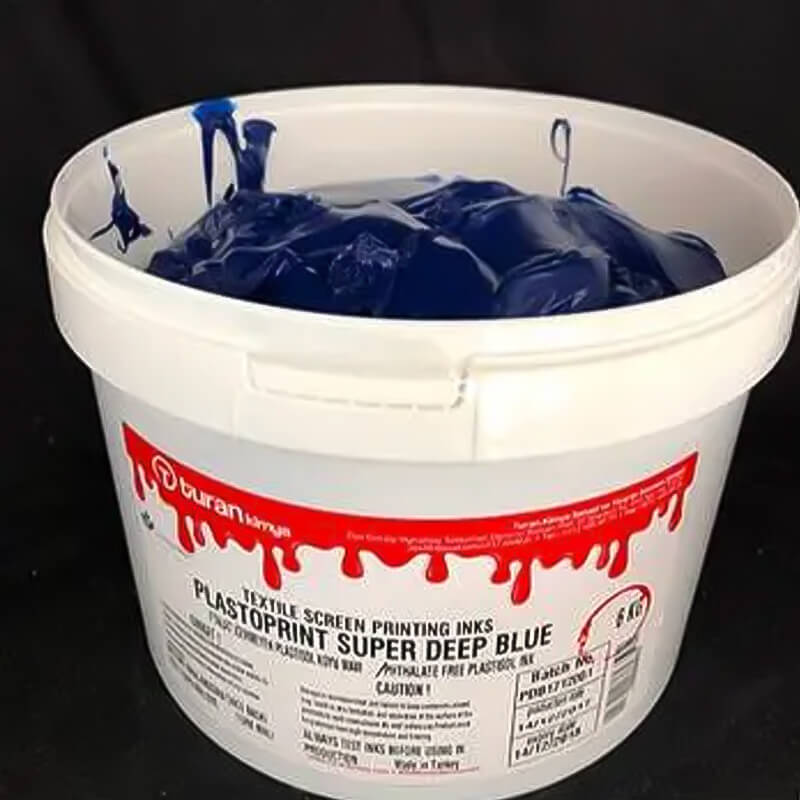
1. Plastisol Ink:
- Popularity: The go-to choice for screen print transfers due to its durability and the ability to reactivate with heat.
- Composition: Made up of PVC particles suspended in a plasticizing emulsion.
- Curing: For transfers, it’s essential to only partially cure or “gel” the ink, allowing for a final application onto a garment with a heat press later.
2. Water-Based Ink:
- Characteristics: Offers a softer hand feel than plastisol and is considered more eco-friendly.
- Composition: Consists of pigments or dyes suspended in water.
- Usage: Less commonly used for transfers because of the need for different handling and curing techniques.
3. Discharge Ink:
- Use: Especially beneficial for achieving light colors on dark garments.
- Working Principle: It removes the garment’s original dye and replaces it with the ink’s color.
- Curing: Similar to water-based inks, it requires heat-setting.
For those diving into screen print transfers, plastisol ink remains the top recommendation due to its ease of use and durability. If you’re wondering where to purchase high-quality ink for your projects, check out the Best place to buy silk screen ink: screenprinting
Essential Tips for Creating High-Quality Screen Print Transfers
Getting the perfect transfer starts with choosing the right materials and techniques. Read on to discover essential tips for success!

Image selection: Choosing high-resolution images and the right design format
Selecting the right image and design format is crucial when getting ready for screen print transfers. Always opt for high-resolution images to guarantee a top-notch print result.
It’s essential to pick the appropriate design format. This could be vector graphics or raster images that boast a resolution of 300 DPI or more. This ensures your image reproduces flawlessly on the transfer paper.
When it comes to printing, don’t forget to set your printer to the best quality setting, often labeled “Best Photo”. This makes the colors pop and keeps details sharp. Moreover, if you’re after the perfect colors and true-to-design text, calibrate your display device before printing. This small step can make a world of difference.
Applying ink: Techniques for even and vibrant colors
Getting the ink application right is a must for top-quality screen print transfers. The ink’s consistency, the pressure of the squeegee, and the tension of the mesh play key roles in achieving a vivid and sharp print on fabric or paper.
If you’re working with thicker inks, they might need a few extra passes to cover completely. When tackling projects with gradients or multiple colors, it’s crucial to skillfully blend different colored inks while they’re still wet. This ensures a seamless transition from one shade to another.
After applying each layer, let it dry before adding the next. This creates a pronounced texture on the material’s surface once fully set. But be cautious: improperly cured prints might fade or change color. Always adhere to the manufacturer’s guidelines during this phase and use the right drying tools, especially when dealing with plastisol screen print transfers.
Curing process: How to properly set the ink for long-lasting results
Achieving the ideal image on a garment hinges as much on the ink setting and curing process as it does on the design itself. Properly setting, or curing, the ink means applying heat within a set time frame.
Curing plays a pivotal role in ensuring that garments stay vibrant and durable. Depending on the intricacies of your design or the fabric in question, there are various techniques to cure the ink effectively. Popular methods encompass flash curing, electric dryers, and conveyor ovens. For plastisol transfers, it’s typically suggested to cure at a temperature of 350-380°F (around 177°C) for a brief 3–5 seconds, factoring in the printing pressure.
Lastly, don’t neglect air circulation around the printed sections. This is vital for successfully setting screen print dye-sublimation transfers, particularly on polyester fabrics. They demand higher temperatures to achieve long-lasting, fade-resistant results.
Must-have equipment and tools
For top-tier screen print transfers, certain equipment and supplies are indispensable.
- Printer: Be it inkjet or laser, a printer is crucial for bringing your designs to life.
- Plastisol Ink: This special ink is your go-to for transferring designs onto fabric.
- Screen Printing Basics: This category covers screens, squeegees, and emulsion systems. They’re all vital for priming the screens to work with plastisol ink.
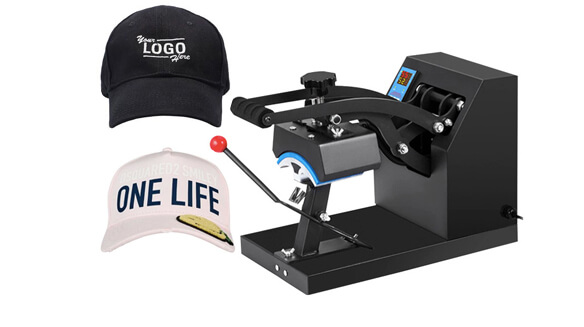
- Heat Press: Sometimes referred to as a ‘hot transfer machine’, this tool comes with adjustable pressure settings. It’s key for firmly setting inks into fabrics, ensuring lasting prints.
- Mesh: Choose a mesh tailored to your fabric type. It aids in distributing the ink uniformly, ensuring consistent color when printed on the material.
What supplies do I need to make screen print transfers?
To make screen print transfers, prepare the following essentials:
- Screens: Mesh frames for ink application.
- Emulsion: A photosensitive material for creating design stencils on screens.
- Ink: Varieties like plastisol or water-based suit different materials.
- Squeegee: To spread ink onto your substrate.
- Exposure Unit: For hardening the emulsion, create a stencil.
- Film/Transparency: Bearing your design, is vital for the stencil-making process.
- Light Source: Required for exposure, with dedicated units offering the most consistent results.
- Washout Booth: For rinsing unhardened emulsion post-exposure.
- Pressure Washer: For effective emulsion removal and screen cleaning.
- Printing Press: Optional, but ensures consistent results.
- Flash/Conveyor Dryer: For ink curing.
- Heat Press: To apply for transfers onto fabrics.
DIY Vs. Professional Screen Print Transfers: A Comparative Analysis
It’s important to understand the advantages and disadvantages of both DIY and professional screen print transfers before making a decision about which approach best fits your needs.
Advantages and disadvantages of making your own screen print transfers
Making your own screen print transfers comes with a unique set of pros and cons. Understanding these can help you make informed decisions and maximize your screen printing efforts.
| Advantages | Disadvantages |
|---|---|
| Customization: DIY screen print transfers let you control and personalize your designs. | Quality: DIY screen printing may lack the durability and crispness of professional services. |
| Cost-Effective: DIY screen print transfers are budget-friendly, especially for bulk printing. | Time-Consuming: Learning screen printing can be slow and requires time, especially for beginners. |
| Learning Experience: DIY screen printing provides hands-on experience and teaches a new skill. | Equipment & Supplies: Initial investment in items like plastisol ink and transfer paper is required. |
| Ease of Transportation: Screen print transfers are easily portable for offsite events. | Longevity: DIY transfers allow customization but may lack the durability of professional prints. |
Therefore, making your own screen print transfers has both advantages and disadvantages. It’s important to weigh these factors based on your individual needs, resources, and expertise.
When to consider professional services: quality, cost, and timing
Before diving into DIY screen print transfers, it’s crucial to weigh factors like quality, cost, and timing. If you’re a beginner without specialized equipment or experience, going the DIY route can be an affordable way to create custom t-shirt designs.
That said, if you’re aiming for top-notch results or intricate prints, professional services might be the better choice. Not only do they bring expertise to the table, but they also have advanced equipment that ensures a higher-quality outcome. Plus, don’t underestimate the value of time. Although pros might take longer initially, they can save you time down the road by minimizing mistakes and avoiding reprints.
Cost is another key consideration. While professional services might seem pricier upfront, they could offer long-term savings. How so? Well, their higher-quality results and reduced need for revisions could mean fewer expenses in the long run compared to DIY projects. So, carefully evaluate your needs and resources before making a decision.
Comparison of costs between DIY and professional services
Creating screen print transfers can be a fun and rewarding DIY project, but it’s important to consider the costs involved. Let’s take a closer look at how DIY screen print transfers stack up financially against professional services.
| DIY Screen Print Transfers | Professional Screen Print Transfers | |
|---|---|---|
| Material Costs | $4-$5/transfer, covering screen, ink, and paper costs | The starting cost is around $10/transfer, excluding setup fees or minimum orders. |
| Equipment Costs | $50-$200 initial investment for essential screen printing gear like screens, squeegees, and inks. | No initial equipment costs; a professional printer provides all tools. |
| Time Costs | Significant time is needed for beginners, including learning, design creation, and printing, taking several hours per design. | Professional services are often faster due to expertise and high-end equipment. |
| Potential Savings | Savings are possible on bulk orders; owning equipment enables limitless designs with only material replenishment costs. | Higher per-transfer cost, but saves time, and effort, and avoids potential errors. |
| Profit Potential | Average cost under $6/transfer; selling for 2x production cost can be profitable. | Professional services yield high-quality transfers, but the cost might reduce resale profit. |
In essence, creating DIY screen print transfers is cost-effective, particularly for big projects or potential business ideas. Yet, professional services offer ease and know-how, a boon for those short on time or patience for the hands-on approach.
Frequently Asked Questions about Screen Print Transfers
1. What is the difference between screen print and screen print transfer?
Screen Printing: This involves applying ink directly to a fabric through a mesh screen stencil. It’s a manual process that is highly durable and ideal for large quantities.
Screen Print Transfer: Here, the design is screen printed onto a transfer paper first, and then that paper is heat-pressed onto the fabric. This is generally easier for smaller runs or more complex multi-color designs.
2. Can I use my Cricut press for screen print transfers?
Yes, you can use a Cricut EasyPress for applying screen print transfers, but the results may vary in terms of quality and durability compared to a commercial heat press. Ensure you follow temperature and pressure guidelines for optimal results.
3. Do you need a heat press for screen print transfers?
A heat press is generally recommended for screen print transfers to ensure consistent temperature and pressure, which results in a more durable and professional-looking outcome. However, alternatives like a Cricut press or even a household iron can be used, albeit with varying degrees of success.
4. Which lasts longer: screen printing or sublimation?
Both methods offer high durability if done correctly. Sublimation dyes the fabric itself, so it won’t crack or peel. Screen printing can be equally durable if the ink is properly cured. The type of fabric and how the garment is cared for will also affect longevity.
Conclusion
Creating your own screen print transfers offers an exciting avenue for personalized designs on clothing or other surfaces. To achieve this at home, you’ll need key supplies like plastisol ink, transfer paper, and a heat press.
First up, mastering the art of setting your screen printing frame is crucial. Similarly, knowing how to mix your colors and apply smooth ink layers will set you on a path to success. These steps ensure you create high-quality prints without leaving your home.
But let’s not forget about the curing process. Following the recommended steps for setting your plastisol ink is vital for longevity. If you skip this, you may find your designs deteriorating much faster than expected.
DIY screen printing offers the bonus of complete creative control. Yet, it might not be the best route for everyone. If you’re looking for quick turnarounds or large production volumes, professional services might be more suitable.